Looking for a fun and eco-friendly way to cook your meals? A DIY solar oven is the perfect project for you. This innovative method uses solar energy to heat and cook food, making it a sustainable alternative to traditional cooking.
Building your own solar oven is easier than you think. With simple materials like an insulated box, reflective foil, and a glass lid, you can create a device that harnesses the sun’s power. It’s a great way to reduce energy consumption while enjoying delicious meals.
This guide will walk you through every step of the process. Whether you’re a beginner or a seasoned DIY enthusiast, you’ll find this project both rewarding and practical. Plus, it’s a fantastic way to explore renewable energy in a hands-on way.
Ready to get started? Let’s dive into the world of solar cooking and discover how you can create your own efficient and cost-effective oven.
Key Takeaways
- Build a sustainable cooking device using simple materials.
- Reduce energy consumption with solar-powered cooking.
- Perfect for beginners interested in renewable energy projects.
- Step-by-step guide ensures easy construction.
- Cost-effective and environmentally friendly solution.
Introduction to Solar Cooking Techniques
Harness the sun’s energy to cook food efficiently and eco-consciously. Solar cooking is a sustainable method that reduces reliance on traditional energy sources. It’s a simple yet impactful way to lower your carbon footprint while enjoying delicious meals.
Sustainable Cooking Benefits
Using a solar oven offers numerous environmental advantages. It eliminates the need for gas or electricity, cutting down on energy bills. Plus, it creates a cleaner cooking environment by reducing smoke and emissions.
Solar cooking also helps conserve natural resources. By relying on renewable energy, you contribute to a healthier planet. It’s a small step that can make a big difference over time.
Overview of DIY Solar Ovens
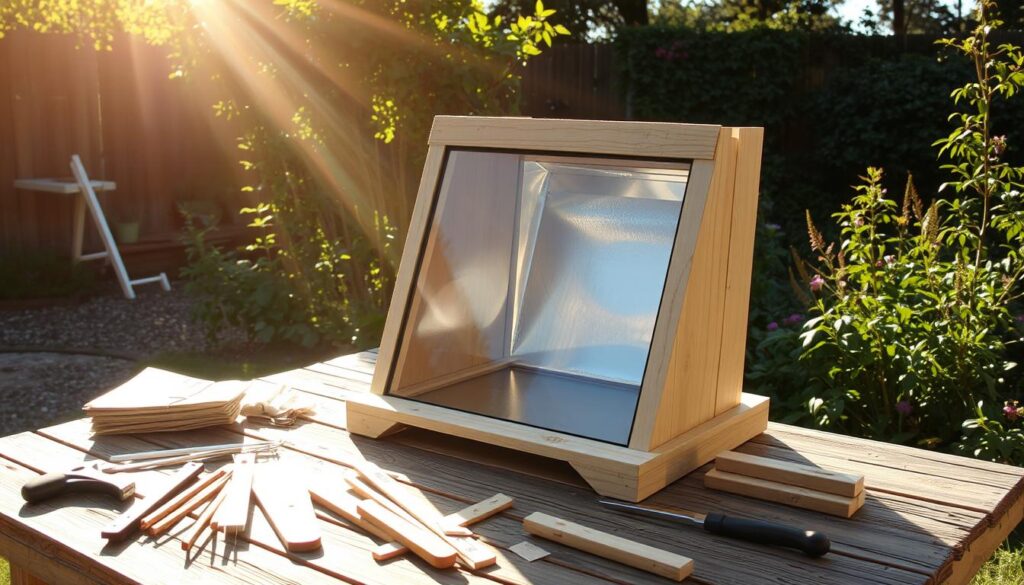
Building your own solar oven is easier than you might think. Common designs use household materials like an insulated box, reflective foil, and a glass lid. These components work together to trap and convert sunlight into heat.
Here’s a quick comparison of popular DIY designs:
| Design | Materials | Temperature Range |
|---|---|---|
| Box Oven | Insulated box, foil, glass lid | 90°C – 200°C |
| Panel Cooker | Reflective panels, dark cookware | Up to 170°C |
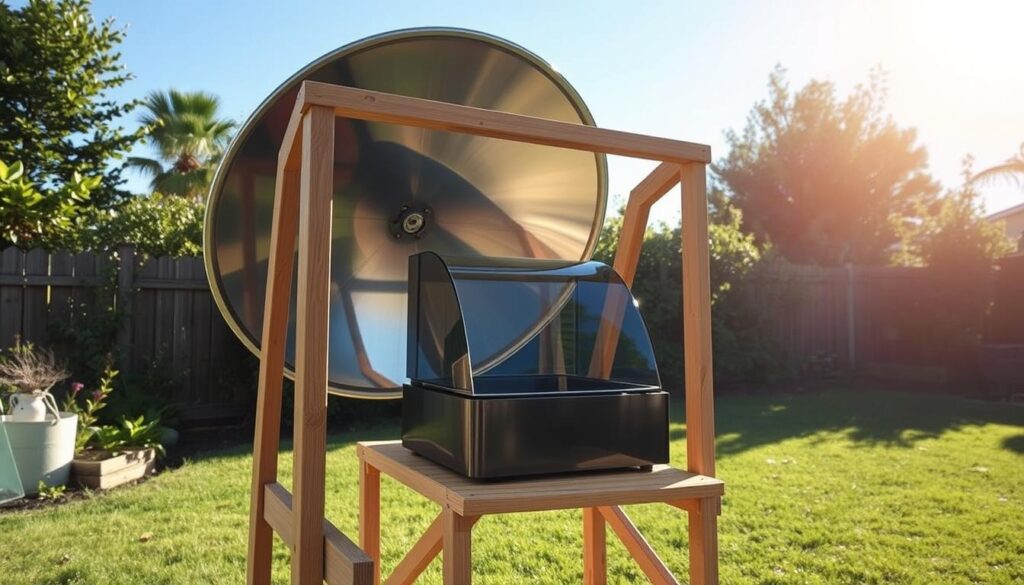
| Parabolic Cooker | Curved reflective surface | Over 200°C |
Temperature and heat retention are key to successful solar cooking. Proper insulation ensures your food cooks evenly and efficiently. Beginners can start with a simple box design and experiment with recipes like rice or stews.
This project is perfect for anyone interested in renewable energy. With a bit of creativity, you can adapt traditional recipes to work in your solar oven. Ready to dive deeper? Let’s explore the next steps in planning your DIY project.
Planning Your DIY Solar Oven Project
Ready to take your cooking to the next level with a sustainable twist? Planning is the first step to building an efficient and durable solar oven. A well-thought-out design ensures your project runs smoothly and delivers optimal results.
Gathering Materials and Tools
Start by collecting all the necessary materials and tools. A sturdy box is essential for the base. Insulating materials like styrofoam or newspaper help retain heat. Reflective foil and a glass lid are crucial for capturing and directing sunlight.
Here’s a quick checklist of what you’ll need:
- Insulated box (sturdy cardboard or wood)
- Reflective foil or aluminum sheets
- Glass or plexiglass for the lid
- Cutting tools, glue, and tape for assembly
Design and Insulation Considerations
Design plays a key role in your solar oven’s efficiency. A well-insulated box ensures consistent temperature levels. Proper sizing and durability are also important for long-term use.
Consider these design tips:
- Choose a box size that fits your cooking needs (e.g., 10 x 10 x 14 inches).
- Use multiple layers of insulation to reduce heat loss.
- Ensure the glass lid fits snugly to trap heat effectively.

| Material | Purpose | Effectiveness |
|---|---|---|
| Styrofoam | Insulation | High |
| Aluminum Foil | Reflection | Excellent |
| Glass Lid | Heat Retention | Good |
By carefully selecting materials and planning your design, you’ll create a solar oven that cooks food efficiently and sustainably. Ready to move on to the next step? Let’s dive into the building phase!
Building Your At Home Solar Cooker
Transform your cooking experience with a DIY project that’s both sustainable and rewarding. Constructing a solar-powered oven is easier than you think, and it’s a fantastic way to explore renewable energy. Let’s dive into the steps to build your own efficient and durable device.
Constructing the Insulated Box
Start by repurposing a styrofoam container for the main insulated box. Styrofoam is excellent for retaining heat, making it ideal for this project. Cut the container to your desired size, ensuring it’s large enough to hold your cooking dishes.
Next, reinforce the styrofoam box with an outer OSB box for added durability. Use wood panels to create a sturdy frame, and secure them with glue and tape. This outer layer provides extra support and protects the insulation from wear and tear.
Installing Reflective Flaps and Panels
Reflective flaps are essential for directing sunlight into the oven. Use aluminum foil to cover wooden panels, creating reflective surfaces. Cut the panels to size and attach them to the sides of the box using glue or tape.
Align the reflective panels at an angle to maximize sunlight exposure. This setup ensures that heat is efficiently directed into the cooking chamber. Make sure the flaps are securely attached to withstand outdoor conditions.
Finally, seal all edges with tape to prevent heat loss. This step enhances the oven’s efficiency and ensures consistent cooking temperatures. With these techniques, your solar oven will be ready to harness the sun’s energy effectively.
Assembling Key Components for Optimal Efficiency
Assembling your solar oven with precision ensures maximum efficiency and durability. Each component plays a vital role in capturing and retaining heat, making the setup process crucial for success.
Setting Up the Glass Lid and Seal
The glass lid is a critical part of your solar oven. It traps sunlight and converts it into heat. Use a glass plate from a poster frame for a cost-effective solution. Make sure the lid fits snugly to prevent heat loss.
To achieve an effective seal, use weatherstripping or silicone around the edges. This ensures consistent temperature levels inside the oven. A tight seal also protects against external elements like wind or dust.

Integrating the Outer Protective Box
The outer protective box adds durability and mobility to your solar oven. Use OSB wood panels for a sturdy frame. This layer shields the insulated interior from wear and tear, especially during outdoor use.
Align all components carefully to prevent gaps that could lead to heat loss. Secure the outer box with screws or strong adhesive for long-lasting performance. This step ensures your oven remains efficient even on less sunny days.
Periodic maintenance checks are essential. Inspect the seal and framing regularly to maintain optimal efficiency. Proper assembly is key to enhancing the overall performance of your solar oven.
Cooking Techniques and Recipe Ideas for Solar Ovens
Discover how to cook delicious meals using the power of the sun. Solar ovens offer a unique way to prepare food while reducing your carbon footprint. With a bit of creativity, you can adapt traditional recipes and explore new culinary possibilities.

Using Dark Cookware for Better Heat Absorption
Dark-colored pots and pans are ideal for solar cooking. They absorb heat more efficiently, ensuring your food cooks evenly. Avoid shiny or reflective cookware, as it can reduce the oven’s temperature.
For example, when cooking rice or pasta, use a dark pot to speed up the process. This simple trick maximizes the sun’s energy and enhances your cooking experience.
Adapting Traditional Recipes to Solar Cooking
Many traditional recipes can be modified for solar ovens. The key is to adjust cooking times and monitor progress. Preheat your oven for about 30 minutes before adding your dish.
Here are a few ideas to get started:
- Rice dishes: Cook for 60-90 minutes, stirring occasionally.
- Baked goods: Muffins and breads take about 45-60 minutes.
- Stews and casseroles: Allow 2-3 hours for tender results.
Experiment with your favorite recipes and make small adjustments as needed. Solar cooking is a fun and sustainable way to enjoy delicious meals.
Maintenance and Safety Tips for Your Solar Oven
Keeping your solar oven in top shape ensures long-lasting performance and efficiency. Regular care not only extends its lifespan but also guarantees safe and effective cooking. Here’s how to maintain your device and handle its components with care.
Cleaning and Handling Reflective Materials
Reflective surfaces, like aluminum foil, are essential for directing heat into your oven. To clean them, gently wipe with a soft, damp cloth. Avoid abrasive cleaners that could damage the reflective layer. If the foil becomes worn or torn, replace it promptly to maintain optimal performance.
For insulated surfaces, use a mild detergent and water to remove any buildup. Make sure all parts are completely dry before reassembling. This prevents moisture from affecting the insulation and ensures consistent cooking results.
Regular Inspections and Safe Storage
Inspect your solar oven regularly for loose flaps, cracks, or ineffective seals. Tighten any loose components and replace damaged parts as needed. Store your oven in a dry, shaded area when not in use to protect it from weather damage.
Here are some additional tips for safe handling:
- Use oven mitts when handling hot components to avoid burns.
- Store the oven in a protective cover to prevent dust accumulation.
- Check the glass lid for cracks and replace it if necessary.
Troubleshooting Common Issues
If your solar oven isn’t performing as expected, check for these common issues:
- Loose reflective flaps: Secure them with strong adhesive or tape.
- Ineffective seals: Replace weatherstripping or silicone around the edges.
- Reduced heat retention: Add extra insulation layers if needed.
By following these maintenance and safety tips, you’ll keep your solar oven in excellent condition. Regular care ensures it remains a reliable and eco-friendly way to cook your meals.
Troubleshooting and Enhancing Performance
Maximize your solar oven’s efficiency with simple troubleshooting and performance-enhancing tips. Fine-tuning your device ensures it operates at its best, even on less sunny days. Let’s explore how to adjust angles, monitor temperature, and resolve common issues.
Adjusting Angles and Reflective Surfaces
Proper alignment of reflective surfaces is crucial for optimal performance. Misaligned panels can reduce the amount of heat directed into the oven. To fix this, adjust the angle of the reflective flaps every 30 minutes as the sun moves across the sky.
Here’s a quick guide to maximize sunlight exposure:
- Position the oven to face the sun directly.
- Use a protractor to set the reflective panels at a 45-degree angle.
- Ensure the aluminum foil is smooth and free of wrinkles.
Monitoring Temperature and Cooking Times
Consistent temperature is key to successful solar cooking. Use a thermometer to monitor the internal heat. If the oven isn’t reaching the desired temperature, check for gaps in insulation or misaligned reflective surfaces.
Here’s a comparison of temperature ranges for different designs:
| Design | Temperature Range |
|---|---|
| Box Oven | 90°C – 200°C |
| Panel Cooker | Up to 170°C |
| Parabolic Cooker | Over 200°C |
Make sure to preheat the oven for 30 minutes before cooking. This ensures even heat distribution and reduces cooking times.
“Small adjustments can make a big difference in your solar oven’s performance. Experiment with angles and materials to find what works best for your setup.”
By following these tips, you’ll enhance your solar oven’s efficiency and enjoy consistent results. Regular tweaks and monitoring ensure your device remains a reliable source of sustainable energy for cooking.
Conclusion
Ready to embrace a greener way of cooking? Building your own DIY oven is a rewarding and eco-conscious project. From planning to cooking, this guide has walked you through every step to create an efficient and sustainable device.
Key design choices like insulation, reflective panels, and proper sealing ensure optimal performance. Whether you’re cooking rice or baking bread, this oven adapts to various recipes with ease. Plus, it’s a cost-effective way to reduce energy consumption and lower your carbon footprint.
Regular maintenance and simple tweaks can enhance its efficiency. Share your experiences and experiment with creative modifications to make it uniquely yours. Start your DIY journey today and enjoy the benefits of sustainable cooking!
