Watching a solar eclipse is a breathtaking experience, but it’s crucial to protect your eyes. Never look directly at the sun without proper protection, as it can cause serious damage. With many eclipse glasses hard to find, creating your own viewer is a practical and safe solution.
Using simple materials like paper, foil, and a box, you can craft a DIY viewer that ensures a safe viewing experience. This guide combines scientific accuracy with easy-to-follow steps, making it accessible for everyone. Reputable sources like ABC7 and Live Science back these methods, so you can trust their reliability.
Whether you’re preparing for the next big event or just curious about safe viewing practices, this guide has you covered. Follow along to create a viewer that lets you enjoy the eclipse without risking your vision. Let’s get started on this exciting and educational project!
Key Takeaways
- Always use proper eye protection when viewing a solar eclipse.
- DIY viewers can be made with common household items like paper and foil.
- Reputable sources ensure the safety and reliability of these methods.
- Never look directly at the sun without certified protection.
- Creating your own viewer is both innovative and accessible.
Preparing for an Unforgettable Eclipse Viewing Experience
Experiencing a celestial event like a solar eclipse is both thrilling and educational. To make the most of this rare phenomenon, understanding the science behind it and following safety guidelines is essential. Let’s explore what makes this event so special and how you can prepare for a safe and enjoyable viewing experience.
The Science Behind Solar Eclipses
A solar eclipse occurs when the moon passes between the Earth and the sun, casting a shadow on our planet. This alignment creates a breathtaking sight as the moon temporarily blocks the sun’s light. Depending on the alignment, you might witness a partial, annular, or total eclipse.
During a total eclipse, the moon completely covers the sun, revealing the sun’s corona. This phase lasts only a few minutes but leaves a lasting impression. Understanding this process enhances your appreciation of the event and underscores the importance of safe viewing practices.
Essential Safety Guidelines for Viewing
Never look directly at the sun without proper protection. Even during an eclipse, the sun’s rays can cause permanent eye damage. Using certified eclipse glasses or a homemade viewer is the safest way to enjoy the event.
A simple box viewer, lined with white paper and a small piece of aluminum foil, can project the eclipse’s image safely. Position the viewer so that sunlight enters through the foil and projects onto the paper inside. This method ensures you can observe the eclipse without risking your vision.
“Proper preparation and the right tools are key to a safe and memorable eclipse viewing experience.”
| Safety Tip | Description |
|---|---|
| Use Certified Glasses | Ensure your eclipse glasses meet ISO 12312-2 standards. |
| DIY Viewer | Create a box viewer with aluminum foil and white paper for safe projection. |
| Camera Safety | Use solar filters on cameras to protect both your eyes and equipment. |
| Proper Alignment | Position your viewer or glasses correctly to avoid direct sunlight exposure. |
By following these guidelines, you can enjoy the eclipse safely and make the most of this extraordinary event. Remember, preparation is the key to a successful viewing experience.
DIY Instruction: at home solar eclipse glasses
Crafting a simple viewer is an easy way to protect your eyes while enjoying a celestial event. With just a few materials, you can create a safe and functional tool that lets you observe the spectacle without risk. Follow these steps to build your own viewer and ensure a memorable experience.
Gathering Essential Materials and Supplies
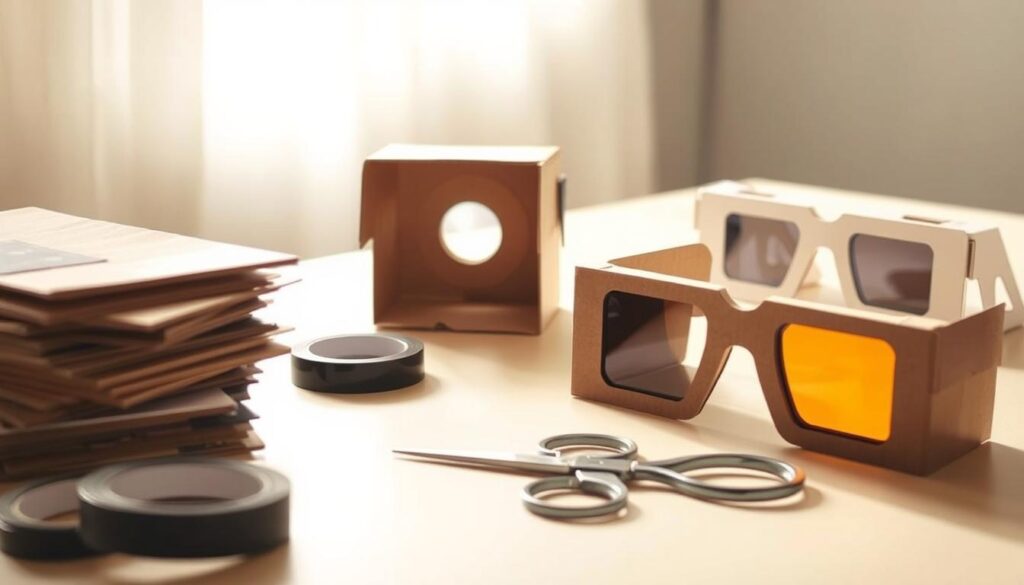
To get started, gather the following items: a pen, paper, a cereal box, aluminum foil, scissors, and transparent tape. These common household supplies are all you need to create a reliable viewer. Ensure your materials are clean and ready for use before beginning.

Detailed Step-by-Step Construction Process
First, trace and cut a small rectangle at one end of the cereal box. This will serve as your viewing window. Next, cover the opposite end with aluminum foil, securing it with tape. Use a pin to make a small pinhole in the center of the foil.
Inside the box, place a piece of white paper to act as the projection surface. Tape the box shut, ensuring no light leaks in. Finally, align the pinhole so that sunlight passes through it and projects an image onto the paper.
Safety Reminders and Testing Your Viewer
Before using your viewer, test it to ensure it works properly. Never look directly at the sun, even during an eclipse. Instead, position the viewer so that the projected image appears clearly on the paper. This method provides a safe way to enjoy the event without risking eye damage.
| Material | Purpose |
|---|---|
| Cereal Box | Provides the structure for the viewer. |
| Aluminum Foil | Creates a reflective surface for the pinhole. |
| White Paper | Acts as the projection surface for the image. |
| Transparent Tape | Secures the materials and prevents light leaks. |
By following these steps, you’ll have a functional viewer that’s both safe and easy to use. Enjoy the event with confidence, knowing your eyes are protected.
Troubleshooting and Enhancing Your Solar Eclipse Viewer
Even the best DIY projects can have small issues, and your viewer is no exception. Whether it’s a misaligned hole or a loose piece of tape, these problems can affect your ability to view eclipse clearly. Don’t worry—most issues are easy to fix with a little patience and the right approach.
Identifying Common Construction Issues
One of the most common problems is a small hole that’s not perfectly centered in the piece aluminum foil. This can cause the projected image to appear blurry or distorted. To fix this, carefully re-punch the hole using a pin, ensuring it’s in the exact center.
Another issue is damage to the box or tape that’s come loose. If the structure isn’t sturdy, sunlight can leak in, reducing the quality of the projection. Reinforce the box with extra tape or consider using a sturdier material for better results.
Creative Upgrades for Better Viewing
If you’re looking to enhance your viewer, there are several upgrades you can try. First, adjust the angle of the box to improve the clarity of the projected image. A slight tilt can make a big difference in how well you see the event.
You can also experiment with different materials. For example, using a thicker piece of aluminum foil or a larger box can create a sharper image. Adding a small screen inside the box can also help focus the light more effectively.
“Small adjustments, done by hand, can significantly improve the performance of your viewer.”
- Verify each step of the construction process to ensure everything is aligned correctly.
- Watch video tutorials from reputable sources for additional guidance.
- Test your viewer multiple times before the event to ensure it’s working perfectly.
By taking the time to troubleshoot and enhance your viewer, you’ll be ready to enjoy the total solar eclipse safely and clearly. Remember, a little effort goes a long way in creating an unforgettable experience.
Conclusion
Preparing for a celestial event like a totality is both exciting and rewarding. By following the step-by-step instructions, you can create a safe and functional viewer using simple materials like a piece aluminum and a box. This DIY project ensures you enjoy the total solar event without risking your vision.
Always make sure to test your viewer beforehand and never look directly at the directly sun. Even a minute of improper viewing can cause harm. Share your experience and improvements with others to foster a community of safe enthusiasts.
This project is not only educational but also a practical way to witness the totality safely. With a little effort, you can enhance your viewing experience significantly. Thank you for exploring this creative and responsible approach to celestial events!
